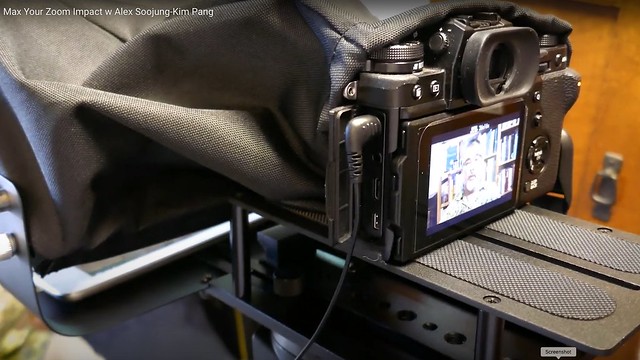
This week I spoke with my friend Christine Armstrong about how to improve your Zoom game, and how even simple changes can greatly improve your look and experience online.
They did a great job of boiling down to 3 minutes a lot of knowledge I’ve picked up about organizing a home studio in the last few weeks.
When you publish a new trade press book, you usually get to spend a few weeks doing book readings, radio and TV interviews, and talks at conferences and professional events.

Speaking at the Royal Society for the Encouragement of Arts, Manufactures and Commerce
I was all geared up for this for new book SHORTER (US | UK), and I was excited for it: I love to travel, I love to talk about the book, and was keen to make the case for the 4-day week. I even went to the UK for a week of pre-publication book publicity.
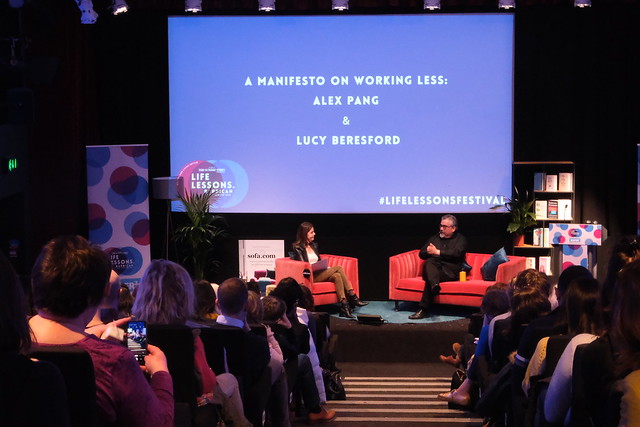
Speaking at the Life Lessons festival in London in mid-February. I was looking forward to doing lots of these events this spring.
Then, a couple days after my book came out, the pandemic swept over America and Britain.
Since then, I’ve still lots of podcasts, radio interviews, a satellite tour, and a couple TV appearances on BBC World and TV Ontario— but it’s all been from home.
Part of a segment on BBC World on the 4-day week and future of work
Early on, I realized that if I can’t talk to audiences live, I need to look and sound as good as I possibly can. It was also clear that even when we get back to normal, corporate workshops and public speaking— two industries that have been really important to me— are not going to be the same. So I’ve had to become an expert on webcams, lighting, sound, and backgrounds. I’m going to be doing remote events for a long time, and I’m betting that people who do them well will stand out in this new market.

Talking to BBC World about the 4-day workweek. The background isn’t especially notable, but I get a nice combination of natural light and light from my camera. And because I’m pretty close to the camera and have the f-stop wide open, the background is pleasantly blurred— something that many webcams can’t do.
Over the last few weeks I been refining my home studio, and chatting with producers about the tech problems they encounter with guests, and ask them for their recommendations. (My books are built on interviewing people, so this is an old habit!)
The most important thing I’ve learned is this:
It’s not difficult or expensive to dramatically improve how you look and sound in podcasts, online events, and TV. You can let out your inner geek and build up a home studio. But you can build slowly, adding bits of kit here and there, as you need. And you can get dramatic improvements in your look and sound by doing just a couple simple things.
So here are recommendations based on my own experience, and advice from radio and TV producers.
1. CONNECT BETTER
If engineers and producers could order all their guests to do one thing, it would be to replace their WiFi with land lines. You’ll have a more stable connection and higher bandwidth— and you won’t lose any freedom unless you’re a realtor who’s giving a virtual tour of a house. There’s a reason Neo and Trinity needed hard lines to travel between real and virtual worlds in The Matrix: they’re stabler and more reliable.
2. SOUND BETTER
“Audiences at this moment are willing to put up with unstable video, but the one thing that keeps them glued is solid audio,” one producer tells me. “Your talking head may bring them in, but it’s your audio that keeps them there.”
Sounding better means a better mic, and a wired one.
There’s a world of difference between the way you sound on a pair of wireless earbuds, and how you sound on a good mic connected directly to your computer (especially if you forget to charge your earbuds and they die halfway through an interview, which can happen). Most of the time I use a Yeti Blue mic, which combines studio-quality sound and great looks (I feel like Edward R. Murrow when I speak into it); I also have a Movo lapel mic and adapter that delivers fine sound. And whatever you use, get a foam cover for it.

Here’s my Blue Yeti mic, on an architects’ lamp-style mount, with my Movo lavalier draped on the side.
The other key to sounding better is to have good headphones. If you’re on video, choose discreet in-ear monitors, unless you want to look like a 1990s telemarketer. These don’t have to be super-high quality: a pair of inexpensive, low-profile in-ear monitors (like KZ ZSTs) can work fine. If you’ve bought a phone in the last ten years, you might have a pair of earbuds stashed away in a drawer somewhere, which probably have a built-in mic.
It’s worth noting that while there are forums where people will argue endlessly about the relative merits of Shure vs. Audio-Technica vs. Sony, mics and monitors are basically commodity products now, and you don’t have to spend a fortune on them. $50 will get you good quality sound and put you in the top 10% of podcast and radio guests; $150 will get you quality that, in a reasonably quiet room, is close to studio.
3. LOOK BETTER
A stand-alone web cam or camera will give you better picture quality and more options for positioning your camera for best effect. There are plenty of good webcams that will shoot in HD or 4K, and if you have a good digital camera, you can turn it into a webcam.
I’m using a Camlink from Elgato, a piece of hardware that lets a digital camera talk to video services. However, as Brendan O’Neil points out to me, a growing number of digital cameras are offering this functionality natively, or their manufacturers are releasing software for your computer that do what Camlink does. (To give you a sense of how fast this is evolving, I bought my Fuji X-T3 in January 2020, and at the time there was no support for using it as a webcam; Fuji recently released software for Windows OS, and says a Mac version is in the works.)
No matter how which upgrade path you use, you’ll get a dramatic improvement in picture quality: the view from my digital SLR is awesome compared to my laptop or iPad.
Also, improve your lighting. If you’ve ever been onstage or on a studio, you know how brightly lit those are. Bring some of that light home. You don’t have to buy a studio-quality light box; a ring light that works with a webcam, or an LED square can attaches to a digital camera, can highlight your face and make you look a lot better.
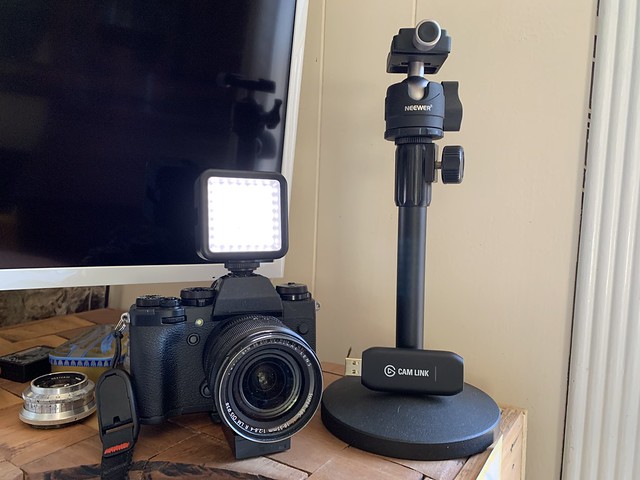
(This is my rig: a Fuji X-T3 (which I bought for fieldwork but which has proved to be an awesome video camera too), a simple LED light, Elgato Camlink, and a desk mic stand with camera ball head. You can get big quality improvements with a relatively small light because you’re going to be close to the camera, and want to illuminate yourself, not the entire scene.)
For maximum flexibility in camera positioning, get a tripod that can sit on your desk (if you have space on your desk) or behind it (if you have space on the floor) for your webcam or camera. Joby Gorilla tripods are pretty good for desk use, but I recently switched to a desktop mic stand (the kind with a heavy round base) with a tripod ball head fixed atop it. (Audio and video equipment have standardized around a couple screw sizes for mounting hardware, so it’s pretty easy to mix-and-match.) This is stabler and easier to adjust, and It has a smaller footprint.
Having a tripod and being able to adjust the height of your camera is also a must if you’re going to record anything where you’re standing (like talks delivered remotely), or if like me you can’t spend hours on end sitting in a chair.
I use my full-size tripod in my garage office.
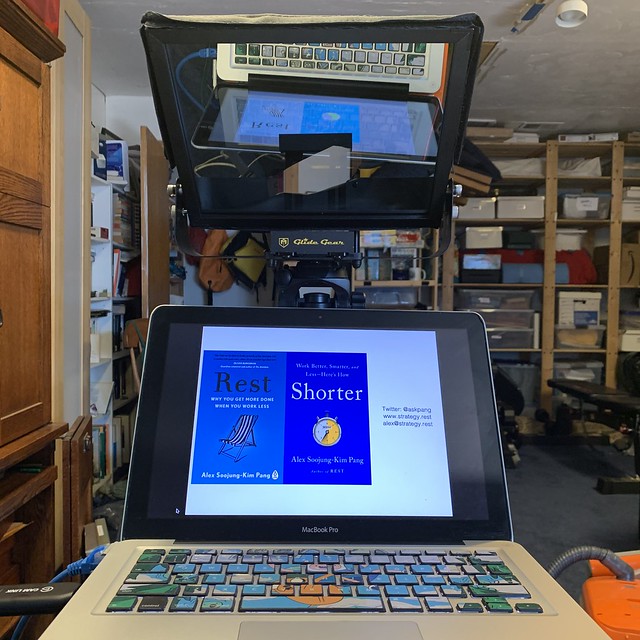
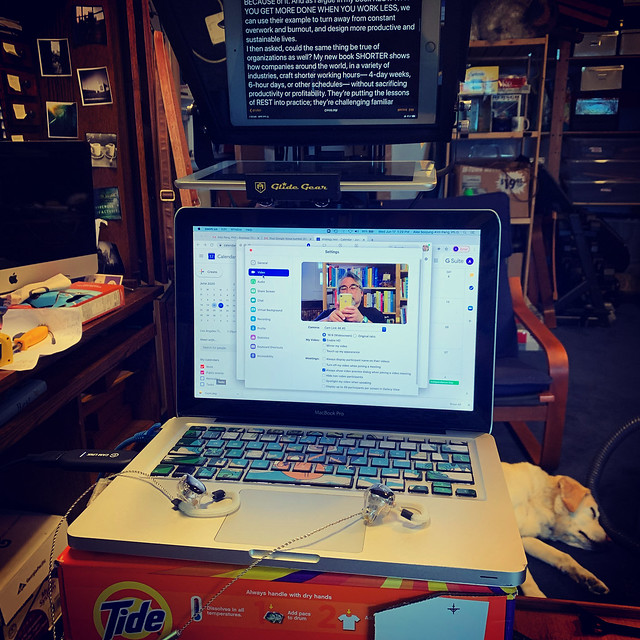
My teleprompter setup in my garage office
This is definitely more advanced, but for more formal events I use a teleprompter (a Glide Gear TMP 100). I find that while doing TV, it’s a challenge to maintain eye contact with the camera; a teleprompter lets you project the feed from a Zoom call to a piece of glass directly in front of your camera. It’s greatly improved my ability to look like I’m talking straight to my audience or responding to a presenter, and less like a suspect in a police interrogation video. It’s also a must when I’m recording classes or instructional videos: I don’t like to freestyle, but do a lot better with scripts.
It’s a lot easier to maintain eye contact with the camera when reading on a teleprompter.
A teleprompter is fairly heavy, so you’ll need a tripod and some counterweights to lower the tripod’s center of gravity and hold everything stable. Of course, having a tripod also means you can record video in more places– which is good if you’re doing online lectures or recording other video for later broadcast.
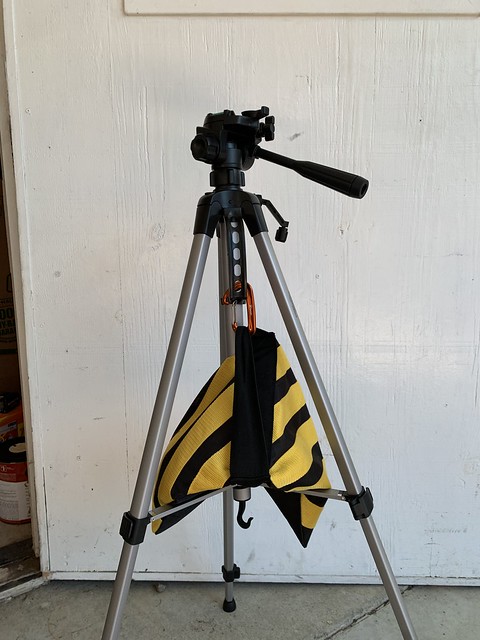
This is a generic tripod with a studio sandbag. The sandbag adds stability to the tripod, counterbalancing the heavy teleprompter and camera. You can fill the sandbag with sand or lead pellets, but I just filled mine with rice. It works fine.
4. BETTER BACKGROUND
This may seem trivial, but your surroundings can subtly communicate a lot about your, or distract from you and your message. If you can position yourself in front of bookcases (and especially your own books!), awesome; otherwise, the less distracting and messy your background, the better.
Of course, everything behind the camera can be more… informal.
You can get a green screen, but most engineers I’ve talked to don’t recommended them. One producer suggests that you “follow room rater (@ratemyskyperoom) on Twitter. Although they have a lot of fun with it, they are quite good at rating rooms and giving advice.” Also, “I’d say lock your office door so you’re toddler-aged children don’t come tumbling in mid live interview, but that’s actually good tv. So keep them open.”
5. HAVE A ROUTINE
Finally, one producer tells me that their best guests always “turn on the web camera, get an idea of how their background looks, and adjust accordingly” a few minutes before they go on-camera.
I like to give myself 15-20 minutes to review whatever emails and instructions I have about the interview, test my camera and mic, make sure my connection is okay, grab a hot drink (Trader Joe’s chai tea, which is great for the throat), and set some cough drops close by.
I also write down the name of the presenter and show on a post-it and put it beside the camera. I never want to forget someone’s name or get it wrong!
I look forward to travel resuming, conferences restarting, and being able to get back out in the world and give talks. But it’s clear that whatever happens in the new normal, we’re going to spend more time talking to audiences and interviewers remotely, and investing a little in your audio and video equipment will pay off in the long run.

